I got the print from Shapeways - it looks pretty good! I went for the raw silver finish and will buff it up myself. I popped the stone out of the bracelet. Just working on getting the ring polished up and then set... Hopefully this weekend. TBC
A graduate student's musings on art, metalsmithing, digital fabrication and design, life, and everything in between.
Monday, September 28, 2015
Monday, September 21, 2015
Compact Progress - Hinge Wires
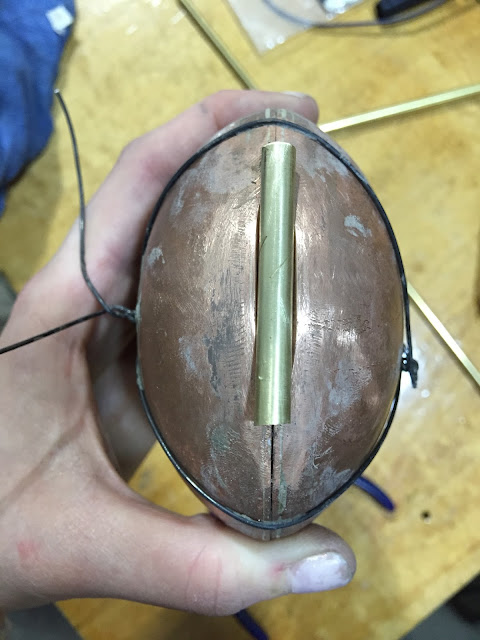
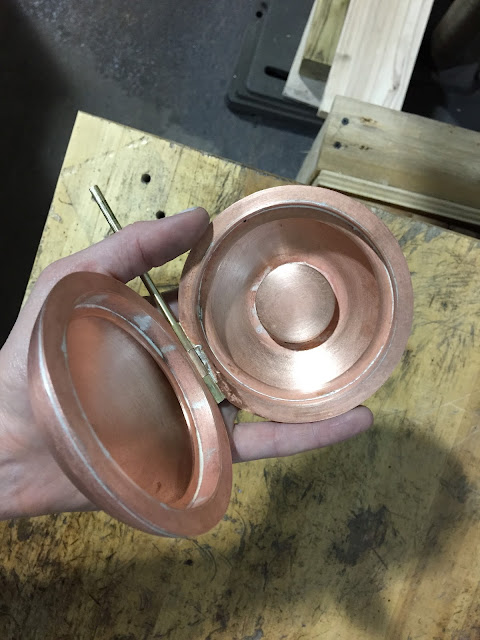
So, I did it... I cut through the hinge. It doesn't look too bad! I'd like to think I knew this would work all along, but... Well you know I didn't mean to save this for the end.
Once I finish cleaning up the tubes, I think I'll solder together the magnet holders and start getting those inset into the opening and file out a little fingernail grip.
All is good.
Once I finish cleaning up the tubes, I think I'll solder together the magnet holders and start getting those inset into the opening and file out a little fingernail grip.
All is good.
 |
 |
| I marked with a sharpie the part that is "unseen" when you move the compact hinge, in hopes to conceal the hole for the cords. |
 |
| I used a ball bur to "center punch" where I'd be drilling. |
 |
| The hole shows just slightly... not sure if I should square this out, or leave it rounded... thinking on it for a bit. |
Tom Burtonwood - Photogrammetry Workshop
Last week Tom Burtonwood visited UWM... He did a workshop on photogrammetry. I had done 3D scanning in the past with a Sense and a Next Engine, but I had never tried using a camera and Autodesk's recap360. Tom demonstrated a scan using Nathaniel as the model. I tried scanning a bike with Fred and Scott... My scan didn't turn out so good, but from what I can tell, it's because all of the surrounding elements were too neutral. Tom mentioned needing lots of "stuff" in the background that is changing, i.e. patterns, people, movement etc. so that the program has an easier determining which content is important and which isn't.
We also learned how to use NetFabb to edit our scans once they were generated. I was already familiar with NetFabb from Frankie's class, but it was still helpful to hear another approach to the software.
Wednesday, September 16, 2015
CMD Chocolate Bar - Part 1
After reading through the Instructables by CrumbTrail, I decided that the plaster mold experimentation shouldn't just end with the functional part for my compact...
I intend to create this as a smaller relief pattern eventually, maybe to cast a clear/semi-transpartent material to use as a diffuser for LEDs in the future.... TBC
I intend to create this as a smaller relief pattern eventually, maybe to cast a clear/semi-transpartent material to use as a diffuser for LEDs in the future.... TBC
Interactive and Multimedia Art - Exploration: Bang Bot
For our first small exercise in IMA, we were asked to create a "Bang Bot;" write a software program in max that can be initiated with a "bang," or push of a button, using a selection of additional MAX objects that have been introduced so far... Here are a couple screen shots and short videos (please don't waste your time watching them all the way - unless you're reeeeeaaaalllllyyy into it, some of the color combinations are really great) that show my process from start to finish....
 |
| All of the objects controlling one circle, this is eventually duplicated and the metros are varied for the 7 different circles that present in the final video animation/software... |
 |
| A bang to initiate all of the bangs through a load message object. |
AND the final product... I could have kept on going and going with this... But you know...
Tuesday, September 15, 2015
Compact Progress - Plaster Molds
Yesterday, I designed and 3D printed a couple test molds for my compact mirror insulation. I poured one set of the straight side mold to see how it works... I also designed a tapered side mold to see if the plaster comes out any easier. I anticipate having to break the molds to get the plaster out, but anything to make it slightly easier would help.
Monday, September 7, 2015
Interactive and Multimedia Art - Max 7 - Tutorials 1-3
Last week was the first week of class for Fall 2015... I received homework in my Interactive and Multimedia Art class; download Max 7, and do tutorials 1-3 for Max... Here's a brief summary of what the tutorials covered:
Tutorial 1; introduced object boxes, inlets, message boxes, and comment boxes, patchcords, how to unlock and lock patches, and use the Reference functions.
Object boxes operate like miniature programs within the larger environments.
Message boxes send messages to objects, and can operate as either commands or control data. Use commas by adding a backslash before, or the result is a new line of text.
Comment boxes are used to add text to controls, such as "click me."
Max programs function by passing messages between objects.
Tutorial 2; introduced bang! message (do the thing you do!), and spatial organization of messages: information is sent right to left when there are multiple messages connected with a bang!
Tutorial 3; numeric data: numbers and lists: integer and floating point number boxes, pack objects and pak objects. $ before a number in a message allows you to have a changing numeric input.
-------------------------------
I also noticed that Max has a series of tutorials built into the program... I may check some of these out during the coming weeks...
Sunday, September 6, 2015
S100 - Rhino Gold - Bracelet to Ring - Progress
I finished up my sample Shapeways print today - working with my friends bracelet, transforming it to a ring... There were a lot of possible ways to take this design, I just tried to do a bunch of different techniques to test out the service and quality of the company's silver prints. I ended up ordering the final in raw silver, so I will do finishing and patina when the piece comes, as well as set the stone after I take it out of the bracelet. The final design is kind of clunky looking in the rendering... but I'm hoping it won't be so once it's printed... But, worse case scenario I just hack into it to feminize the form a litte more.
Friday, September 4, 2015
Compact Progress - Neoprene Update
So my neoprene samples finally dried fully in the 3D printed mold... and they look like deflated cheesecakes! I will clean up one to fit in the battery insulator to test it's function... I'm also going to design a 3D printed mold for pouring plaster, and then pouring neoprene into the plaster.
Wednesday, September 2, 2015
e-NABLE Fellowship - Karuna's Trumpet Holder - MORE RENDERING
So, if you haven't figured it out yet - I love rendering. Here are some more of the trumpet holder, including a small video test.... More to come!
Compact Progress - Cradle Hinge is on but....
WOW. I got a lot accomplished on this thing last week and never posted about it... But that could also be because this is one of those moments where you make something and it's just how you want it, and you're super happy - but then you realize you lost sight of your intentions... WHOOPS! I forgot the holes for the cord :(. I might be able to improvise something though... Still thinking on how I will solve this problem without ruining my aesthetic.... TBC!
 |
| Before the hinge.... |
 |
| Yes, I did file out the entire hole for the cradle.... I am that insane. |
 |
| A little book help never hurt. |
 |
| I am using a couple magnets for the closing/clasping mechanism. |
 |
| Seams got a little messy, but I got it in one shot! |
 |
| I soldered the hinge tubes on almost perfectly, with what I'm calling the "Tim Method" - marking position with a file, rather than soldering with the tubes and no-flo. |
Subscribe to:
Comments (Atom)


